Launching can be really stressful. Planning the strategy, getting all assets and files created, communicating with your team, marketing yourself, and all whilst chatting to clients and trying to make those sales… undoubtedly, it always ends up with a last-minute Canva rush or a panicked sales page change… am I right? That’s why Today I’m going to be focusing on how to make your next launch a success!
It’s no secret how much I love templates! Emails, sales pages, auto-responders… using templates for my launches made my life (and my clients’ lives) so much easier. Nearly everything you do repetitiously within your business can be templated.
You see, templates get a bad rep. And I get it, no one wants anything that’s duplicated, or unoriginal…but how about you view templates as a framework and process approach that saves you time, and allows you to put that extra time back into personalizing and improving other aspects of your launch & operations.
I want to share with you a simple five-step process I use to turn practically any launch process into an easy-to-follow template that can be rinsed + repeated over and over again, saving myself tons of time in the process!
1. Step 1: Brain Dump your launch moves!
Perform a brain dump of all the tasks you carry out when going about a new project, such as a launch, new hire, new offer, etc.
This can look like making a simple list in a word doc and making sure to capture everything you do from start to end!
It’s going to look a bit different for each different type of launch…however you’ll be able to recognize some themes!
2. Step 2: Categorize your launch activities!
Categorize the tasks within your project based on the phase of the project they occur in (beginning, middle, or end).
This typically looks like understanding if this goes into the PRE LAUNCH, LAUNCH, or POST LAUNCH category. This will help you determine due dates as you move into Steps 3 & 4!
3. Step 3: Add your task to your PM tool!
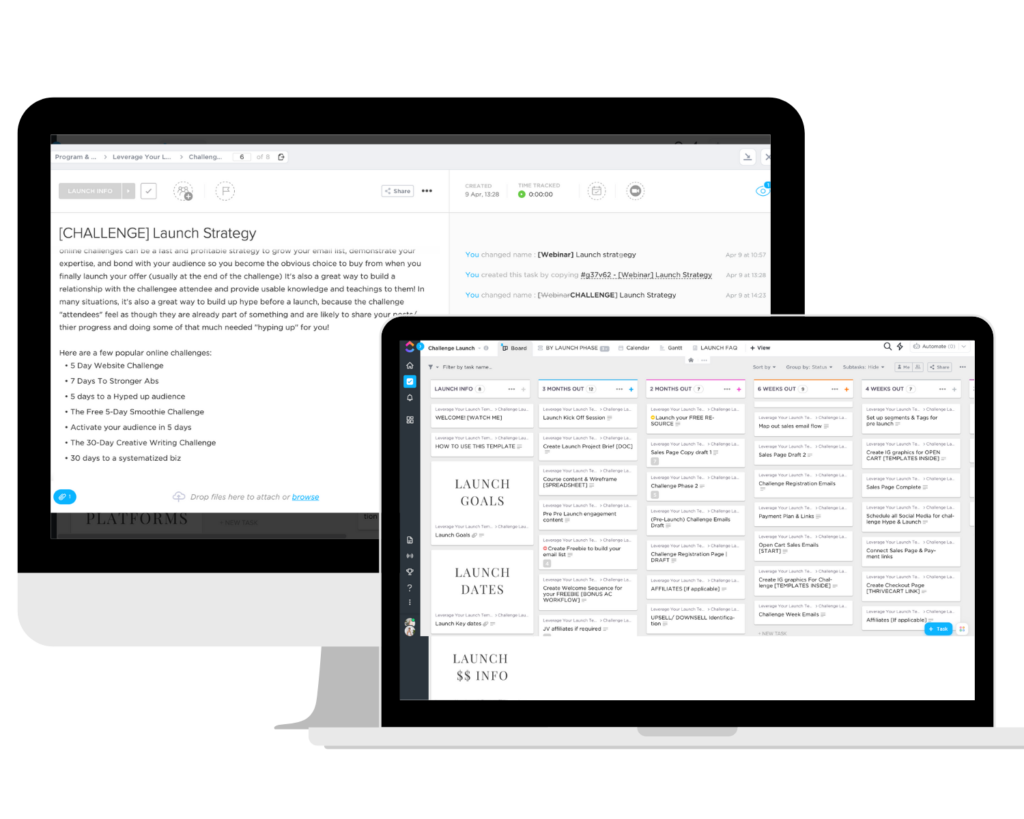
Within your PM tool, add these phases of your project as sections in the order they occur! I’m such a fan of ClickUp for this, as it gives me so much choice between different views (I’m a lover of the board view for launch planning- see below!)

4. Step 4: Add in all of your launch assets for success!
Add in each of the tasks under their respective section, along with any SOPs resources and other necessary information to carry out each task. I personally love to add in all of the launch templates, email templates, files, and images relevant to that launch.
Adding these into your launch project template will make it easier when you’re doing this launch again! It’ll save you so much time!
5. Step 5: Launch & repeat
Duplicate and repeat, building out task lists under each project phase for each project you carry out within your launch to ensure you make your launch a success.
Remender to go into detail into sub-tasks…
For example, If you have a primary task to create a sales page, there are likely going to be several other smaller, (but equally important!) tasks that go into that Sales page creation, including but not limited to copy creation, imagery creation and so forth! Add in all of these tasks nestled under the primary task.
If you’re still at a loss and want help creating a templated Launch plan to help make your launch a success, you can start using my already created launch assets! This launch template has been created with 3 launches in mind, a Webinar launch, a Waitlist Launch, and a challenge launch, it’s already complete with sales page templates, checkout pages, and emails…saving you hours and hours of launch planning!
Want to see how I create SOPs & project plans for other areas of my business? Click here to read the 5 easy steps to follow!
Add A Comment
VIEW THE COMMENTS